
Here's the NEW revised edition
of a previously-released canister "wrap"
that now, instead, includes the build-it-yourself
card stock canister form.
This version includes a taller, hexagon-based top hat
with band and snowflake decoration,
and a detailed, layered mitten.
In combination with other "original decorations",
this fun-to-create special seasonal decoration
is sturdy enough to get out year after year.
Measures 9" tall x 3" wide (canister) x 2" deep.

ASSEMBLY:
1. Identify and cut the shapes:
A canister tube main shape
B bottom rim and whole shapes
C top rim shape
D hat crown shape with band & snowflake
E hat upper brim shape (hex cutout)
F hat brim reinforcement circle
F hat brim reinforcement circle
G hat lower brim (slots for flange)
H hat connector flange
I face shapes
J mouth button positioning template*
K front buttons with positioning template*
L scarf band and drop shapes
*cut these shapes as "joined" to each other when the file opens in original format, then save the section where they are cut to use as a positioning guide (see steps ____).

2. Build the canister. Please follow this LINK to view the canister assembly on the blog post for the Scarecrow Canister project. steps 2-6, then return here to complete the specific steps to complete this Snowman with Mitten Canister.

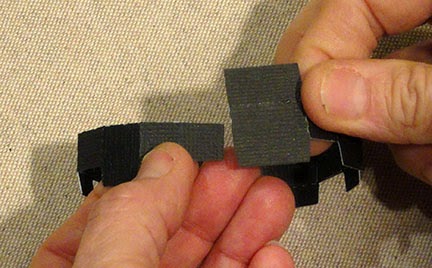
3. Prepare hat crown shape by folding bottom edge tabs outward (valley folds), all other vertical perforations and upper edge tabs back (mountain folds).
4. Fold crown into a tube to bring together the straight side edge and the side tab. Overlap edge over tab to the perforation line, adjust so that top and bottom perforation lines are even, then glue seam.

5. Fold all upper tabs to horizontal, then apply glue, fold top hexagon down into position, adjust, and glue edges to tabs.

It may be helpful to turn the hat crown top side down on a flat surface and press tabs against hat top from the inside to secure the tab seams.

6. Fold crown lower edge tabs outward. Slide upper brim shape (with hexagon cutout) over the top of the crown assembly. Slide down until it seats fully at the tab lines.

7. Apply glue between the tabs and underside surface of the upper brim circle and glue tabs in place.

Press against the upper face surface of the brim to secure the tabs to brim.

8. Position and glue the middle reinforcing brim circle over the underside surface of the hat assembly. Take care to align circle edges of both layers while adjustments can still be made.

9. Prepare hat connector flange by folding on the lengthwise perforation line, also fold each of the rim tabs back.

10. Glue the rim tabs to the backside of the flange except leave the end tab opposite the side tab folded up and unglued.
11. Fold the flange into a ring. Apply glue to both sides of the end tab, then overlap the opposite end un-glued tab over the end tab, straight side edge overlapped to tab perforations. Fold the rim tab back (to the inside) and glue in place.

12. Prepare to insert the flange assembly into the lower brim circle (with slots) by locating the center front and center back widest sections of the flange, and the corresponding center front and center back longest slots on the brim.
Brim circle is face up. Insert flange tabs into corresponding slots . . .

. . . until all are in place and the flange is pushed in completely.

Fold the tabs to the outside and glue in place securely.
It will be helpful to do preliminary gluing of the tabs, then turn the assembly bottom down on a flat surface, then apply pressure from the face side of brim circle to fully secure the tabs.

13. Prepare to attach the upper hat assembly with the lower brim assembly by identifying the front of each unit (selected hexagon face away from seam or widest flange section respectively).
Apply glue to one of the inner surfaces of these units to be joined, then orient with fronts exactly aligned, then join. Check circle edges for accurate alignment. Apply pressure all around brims to ensure a smooth and complete joint.

14. Prepare the hat band by folding all of the vertical short perf lines back (mountain folds). Apply glue to the backside of band.
Position one of the center segments of the band over the front of the hat crown, align perforation lines to crown tube angles. Glue first section, then wrap and glue each of the segments against a crown surface. Overlap the straight band end over the opposite end tab near the back of the hat assembly.
Attach snowflake accent on right "face" of hat over hat band.
 15. Layer (optional) the black eye top and bottom shapes, then position approx. 1/2" below the canister top rim, on the front face.
To plot the mouth position, use the retained "waste" cutout produced when the teeth circles were cutout in their original "grouped" arrangement. NOTE that the circles will be attached on both the front canister face, as well as the two side front faces. Add a crease to the two teeth circles where they will need to "wrap" over the canister shape angles (second in from each side).

16. Position the check circles and nose within the face arrangement. Position, wrap and attach the scarf band in similar fashion to the hat band in step 14.
17. To plot the front button shapes, use the retained "waste" cutout for the buttons in similar manner to the template used for the eyes, step 15.
Glue buttons in place. Glue the heart in place.

18. Layer the mitten shapes on the base mitten:
a) the cuff contrast with detailed ribbing cuff on top;
b ) center panel with end strips and zipzag strip.
Position the mitten on the right side canister "face" , and glue together the surfaces that meet.

19. Place the hat on the canister by fitting the hat flanges into the top opening (this will be a fairly snug fit).

Here is the finished canister.
Position one of the center segments of the band over the front of the hat crown, align perforation lines to crown tube angles. Glue first section, then wrap and glue each of the segments against a crown surface. Overlap the straight band end over the opposite end tab near the back of the hat assembly.
Attach snowflake accent on right "face" of hat over hat band.
To plot the mouth position, use the retained "waste" cutout produced when the teeth circles were cutout in their original "grouped" arrangement. NOTE that the circles will be attached on both the front canister face, as well as the two side front faces. Add a crease to the two teeth circles where they will need to "wrap" over the canister shape angles (second in from each side).
16. Position the check circles and nose within the face arrangement. Position, wrap and attach the scarf band in similar fashion to the hat band in step 14.
17. To plot the front button shapes, use the retained "waste" cutout for the buttons in similar manner to the template used for the eyes, step 15.
Glue buttons in place. Glue the heart in place.
18. Layer the mitten shapes on the base mitten:
a) the cuff contrast with detailed ribbing cuff on top;
b ) center panel with end strips and zipzag strip.
Position the mitten on the right side canister "face" , and glue together the surfaces that meet.
19. Place the hat on the canister by fitting the hat flanges into the top opening (this will be a fairly snug fit).
Here is the finished canister.
Final views of the canister, hat off and hat on.


How did you make the distressed look on the body of the snowman (white cardstock)? TIA!
ReplyDeleteHow did you create the distressed look on the white cardstock?
ReplyDeleteI use distress inks by Jim Hotz and foam fingertip applicators. <u favorite "go-to" color is "pumice stone".
Delete